
What’s Here?
On this page will be tips and tricks on recording your music ranging from equipment and hardware to software and its configurations.
Hardware
Cables
XLR
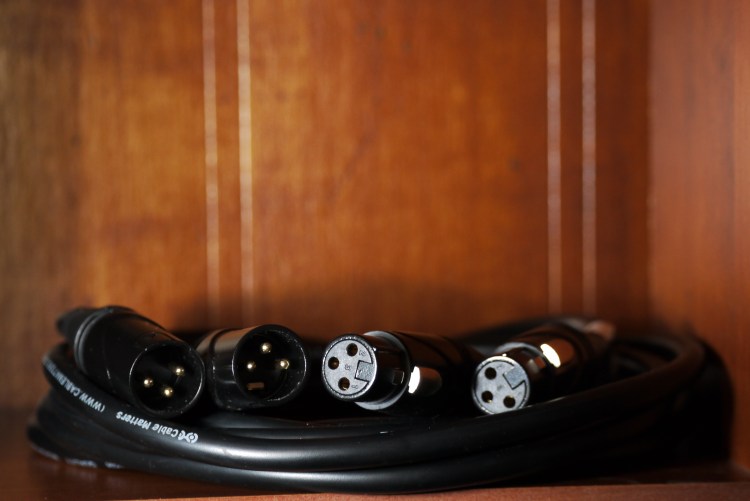
This is the traditional cable for microphones( though some do use the 1/4″) It is BALANCED, which means the audio transmitted will be pushed at a strong level to push something like a PA speaker. Sometimes can be used for equipment other than microphones
1/4″ Cable (6.35mm for you weirdos, just kidding imperial measurements sucks)
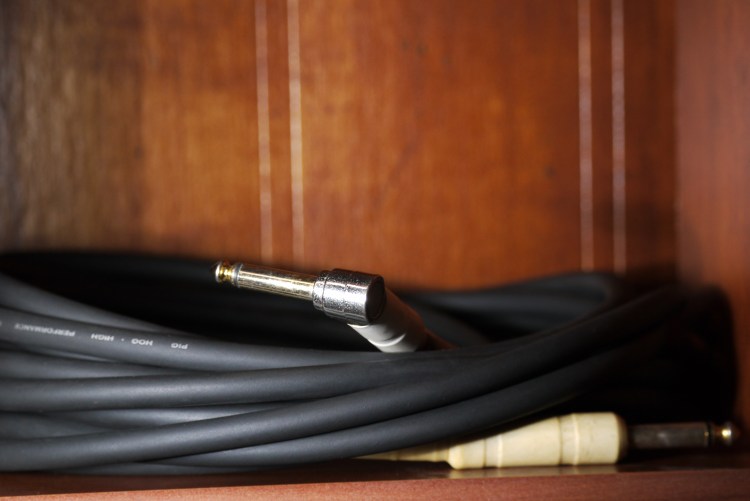
This is the most common cable you will be using to connect an instrument to something (a pedal, an amp, an audio interface, anything else you want to try that has a connection to fit) and is considered an unbalanced cable, which won’t push the sound as hard. To connect direct to a PA will need to push the volume a little more than with an XLR cable
Digital Interface
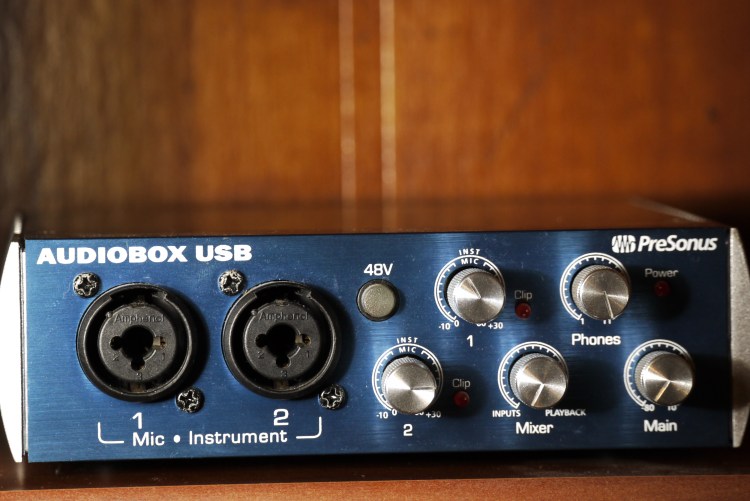
Right here we got the front of the interface. There are 2 inputs. It’s a cool kind that lets you connect either an XLR or tradition 1/4″ instrument cable. Each has its own kind of sensitivity for the kind of things of input, a line input is typically a little “hotter”. Each input has knob that controls the pre-amp, go too far and you can get some distortion. Right next to each knob is a light that lets you know when you are clipping (getting distortion). You generally want a clean but powerful sound so I tend set the knobs to just under the clipping range. This helps you get good audio you can manipulate safely. The 48V switch helps you use a microphone that needs power, it’s called phantom power, I haven’t needed to use it yet. The Mixer knob lets you blend the dry sound going in with the sound after the processing of your DAW. Wanna hear what it sounds like from the input of the interface to what you are recording off of? You’ll swing it toward the input. If you want to hear how you set up the tone through the processing, you’ll swing it towards the playback side. Then there are the Phones and Main knobs, which control the volume for the outputs you’ll see in the back (the next photos)
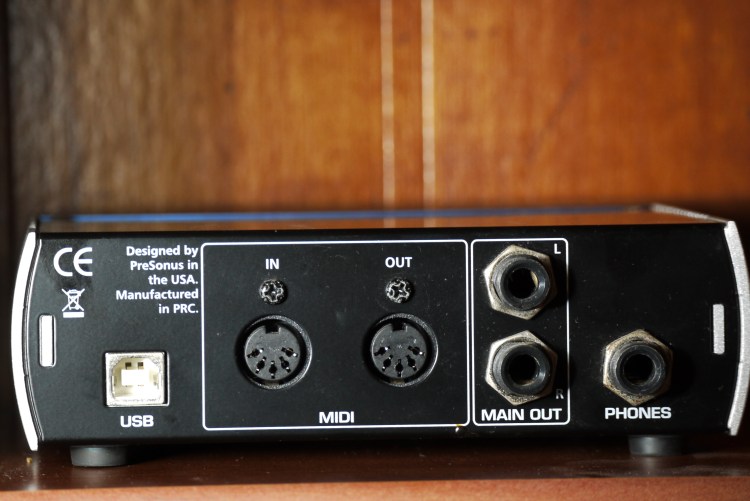
Now we’re looking at the back of the unit. We first see the USB port to connect the interface to you computer (some units could let you just have some power to use it as an interface to connect speakers.) We then see MIDI ports, this helps you control your DAW to do functions you program. My MIDI experience is more in regards to programming (compositions) than the hardware. Then we have the Main Outs which let you connect to individual speakers to get your sound, Left and Right, each mono. You also have the Phones output which gives out a stereo output
Software
Basic Recording (DAW Digital Audio Workstation)
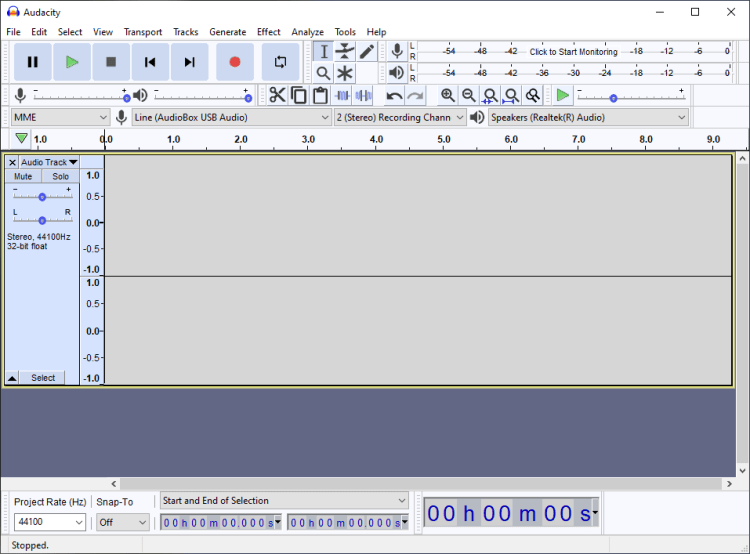
This may not seem like the most cosmetically appealing software, but it can do so much! You can put in your own plugins and go as deep as your technological access lets you. Though most people just use it as you see it, simple recording on your computer. This software has been available for many years and is open source. It is free for essentially any operating system you may have. Right next to the microphone symbol, you can choose your audio source. Right next to the speaker symbol, is a drop down menu that lets you choose your output. Giving those simple things a look over before you click record is ESSENTIAL!
Follow My Blog
Get Bodacious content delivered directly to your inbox.
Useful Links
- (Guitar Scales) http://www.all-guitar-chords.com/guitar_scales.php
- (Piano Chords) https://www.pianochord.org
- (Good Program for Tablatures) https://www.guitar-pro.com/en/index.php
- (Freeware Version of a tab program) http://www.power-tab.net/
