
In photography, you consider variables in the “Exposure Triangle” to make sure your shots are not too dark and not too bright, but at a good balance. Exposure is the balance of light and dark in a photo. The brightest and darkest spots, together, make up the dynamic range of the shot, some cameras have a wider range than others. A shot will definitely be too bright (known as being “Over exposed”) when there are spots in the photo that are at or nearing white, where there really isn’t, and is dark (AKA “Under Exposed”) when spots of near or absolute black appear, where there isn’t.

The symbol above is the exposure symbol, you’ll see it when your photo is balanced (in terms of light), according to the computer inside the camera detecting levels. You’ll also see a gauge that tells you how far off the “equilibrium” for good exposure you are.
Over and Under Exposure


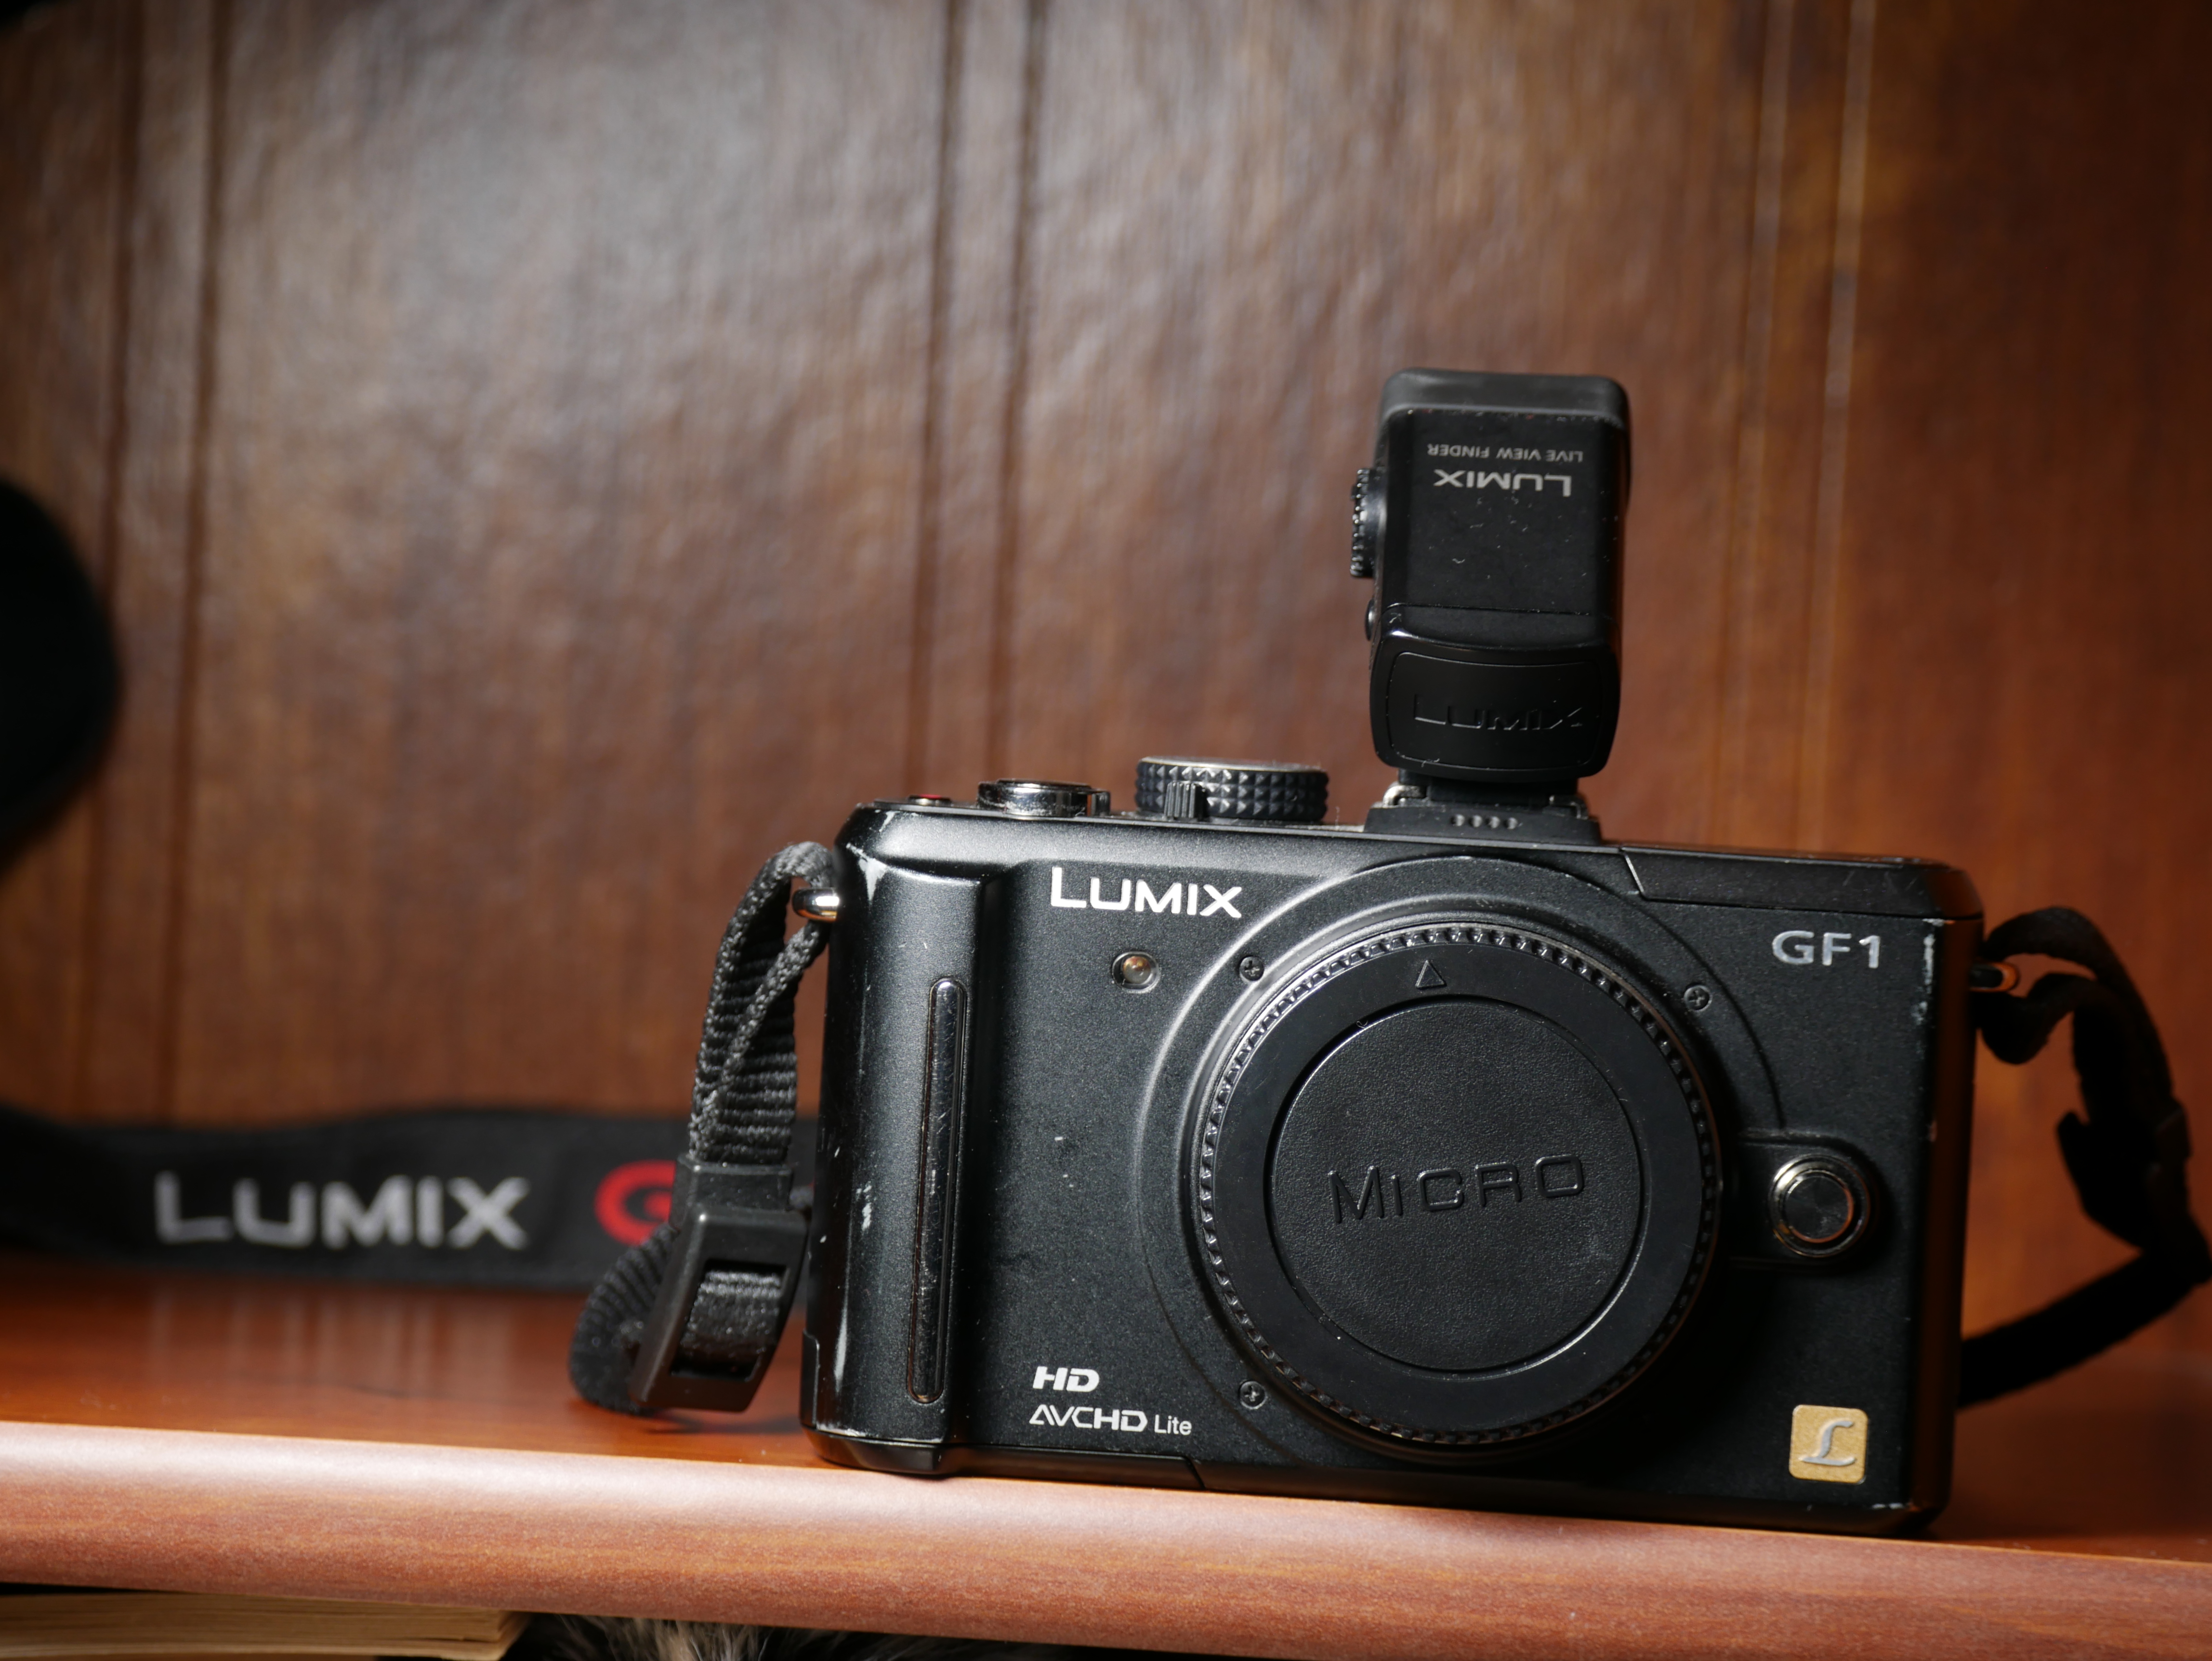
The photo here on the left is a photo that is Over exposed. The background, in real life, is dark brown, but my settings made me blow up the colors. Even the black camera looks more grey. These same settings would be working well if I removed the light source, maybe…
Now, here on the second image we have settings that make the scene seem like there is no light source. We are almost left with only being able to see the whitest parts, like reflections and the LUMIX logo. This photo is very much under exposed. The same settings here would probably work outdoors in optimal sunlight.
Something to note is that in both images, the lighting, in real-world, was EXACTLY the same. You’ll see it as it really is supposed to be later in this post. The only changes made were internally with different settings. Those settings are what we will be talking about today.
Exposure Triangle
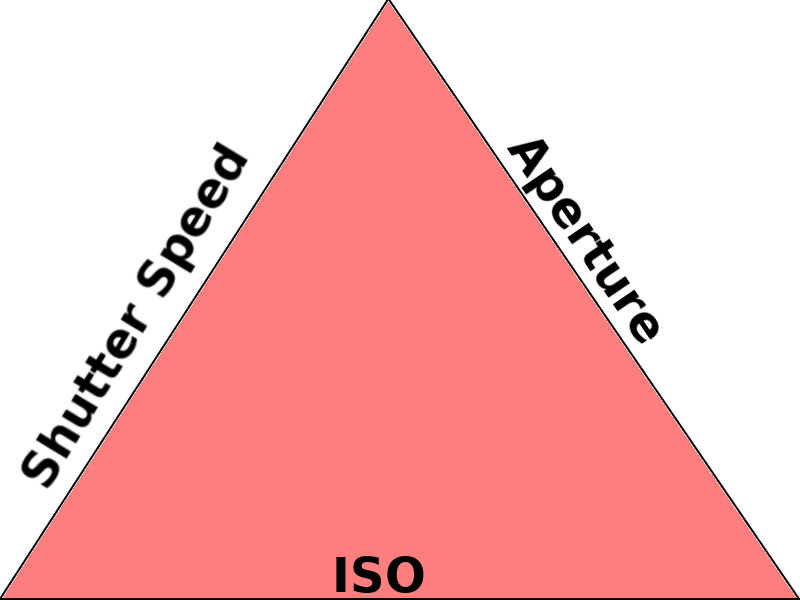
The idea of working a concept in the triangle tends be done with the idea of “choose 2 out of three”, but really is about the balance of all three aspects. Think of it as a weird triangle plate standing on a pole (for some reason, like one of those circus shows with the balancing spinning plates, but here, there is no spinning since we want to put things on our plate, it would fly out if we were to spin it, don’t be silly.) The plate will stay on the pole when you put an even weight throughout the plate, to reach a sort of balanced equilibrium. One section is your grains, one is your protein, and one is your vegetables, it will make your meal, but for some reason food tastes best when it balances well on a plate on a pole, who knew the secret to good food had gravity involved. Putting too much on one side, compared to the others, will tip the plate over and no more food for you.
The idea of each meal translates to each photo you want to take, it’s about the balance for your product (whether the plate of food or, in our case, the photo.) Instead of the foods we want balanced, we have the factors of photography Shutter Speed, ISO, and Aperture to consider the variables of. A fallen plate is a photo that is over- or under-exposed. That’s due to how you balanced the factors. So just put some of one and some of the other and a sprinkle of the third and get your photo, and you’re done, right? Well each of those variables do more than just make photos brighter or darker, though they do by the very nature of how they work, it’s not the “main goal” of the variable. However, depending on your shooting scenario, it may not be the priority of your shot. Sometimes it’s too dark and you need to compensate one of the variables to try to get a usable photo… sounds scary at first but it will be cleared up by the end of this post.
Shutter Speed

You know those speed lines comics have to show speed? Well the motion is replicated in real life photography with a slow shutter speed. What’s shutter speed? It’s the time it takes for the camera’s shutter to close. The time is how long the camera’s sensor is absorbing in photons (the transference of what you see, to capture in the camera, is done through light (photons) just like your eyes, since everything you see is really a reflection of light. You really don’t need to know the science, just know the result of different variables). You tend to see it as 1/x (ex 1/60), where the x is another number to mean it’s 1 __th of second, or as whole numbers like 1′ or 4′ (it can go up to however long you want with certain settings), which is the number of seconds it takes for the shutter to close.
In the picture above, I had the camera set up to take a 2 second shot (2′). In that 2 seconds lots of people were moving, but some stayed still. You can tell by how Sharp subjects/objects in the image are compared to the blurred outlines. The plants on the top left and the dude on the bottom are sharp, as are the speakers on the top right and some people scattered around. The plants had barely no wind so it was static, the guy was busy on his phone, and non-sentient speakers don’t move, they all stayed still during the 2 second duration. Throughout, you’ll see blurry people. Those people were moving around in the 2 seconds.

An idea to have in mind is a painter painting a cloud. The problem is the painter has poor memory and can’t memorize the image the whole time it takes to draw in all the details. The painter starts painting and it takes them 30 minutes to complete it, the other problem is that a cloud tends to change shape pretty quickly. Almost every time the painter looks at the cloud again for reference, it is in a different formation. Working on a single canvas, with bad memory, will result in an amalgamation of the different instances of the cloud the painter saw from the beginning since the painting isn’t of a single point, but of a string of time. When taking the photo, the shutter speed is how fast a moment the painter has to capture an image. The canvas is the sensor. The result for both is an image!
When working with sports and other fast moving subjects, you need to shoot faster. The “painter” (sensor) should try to catch the moment of action, go too slow and it will be only blur, going fast will let you capture the movement as sharply as possible

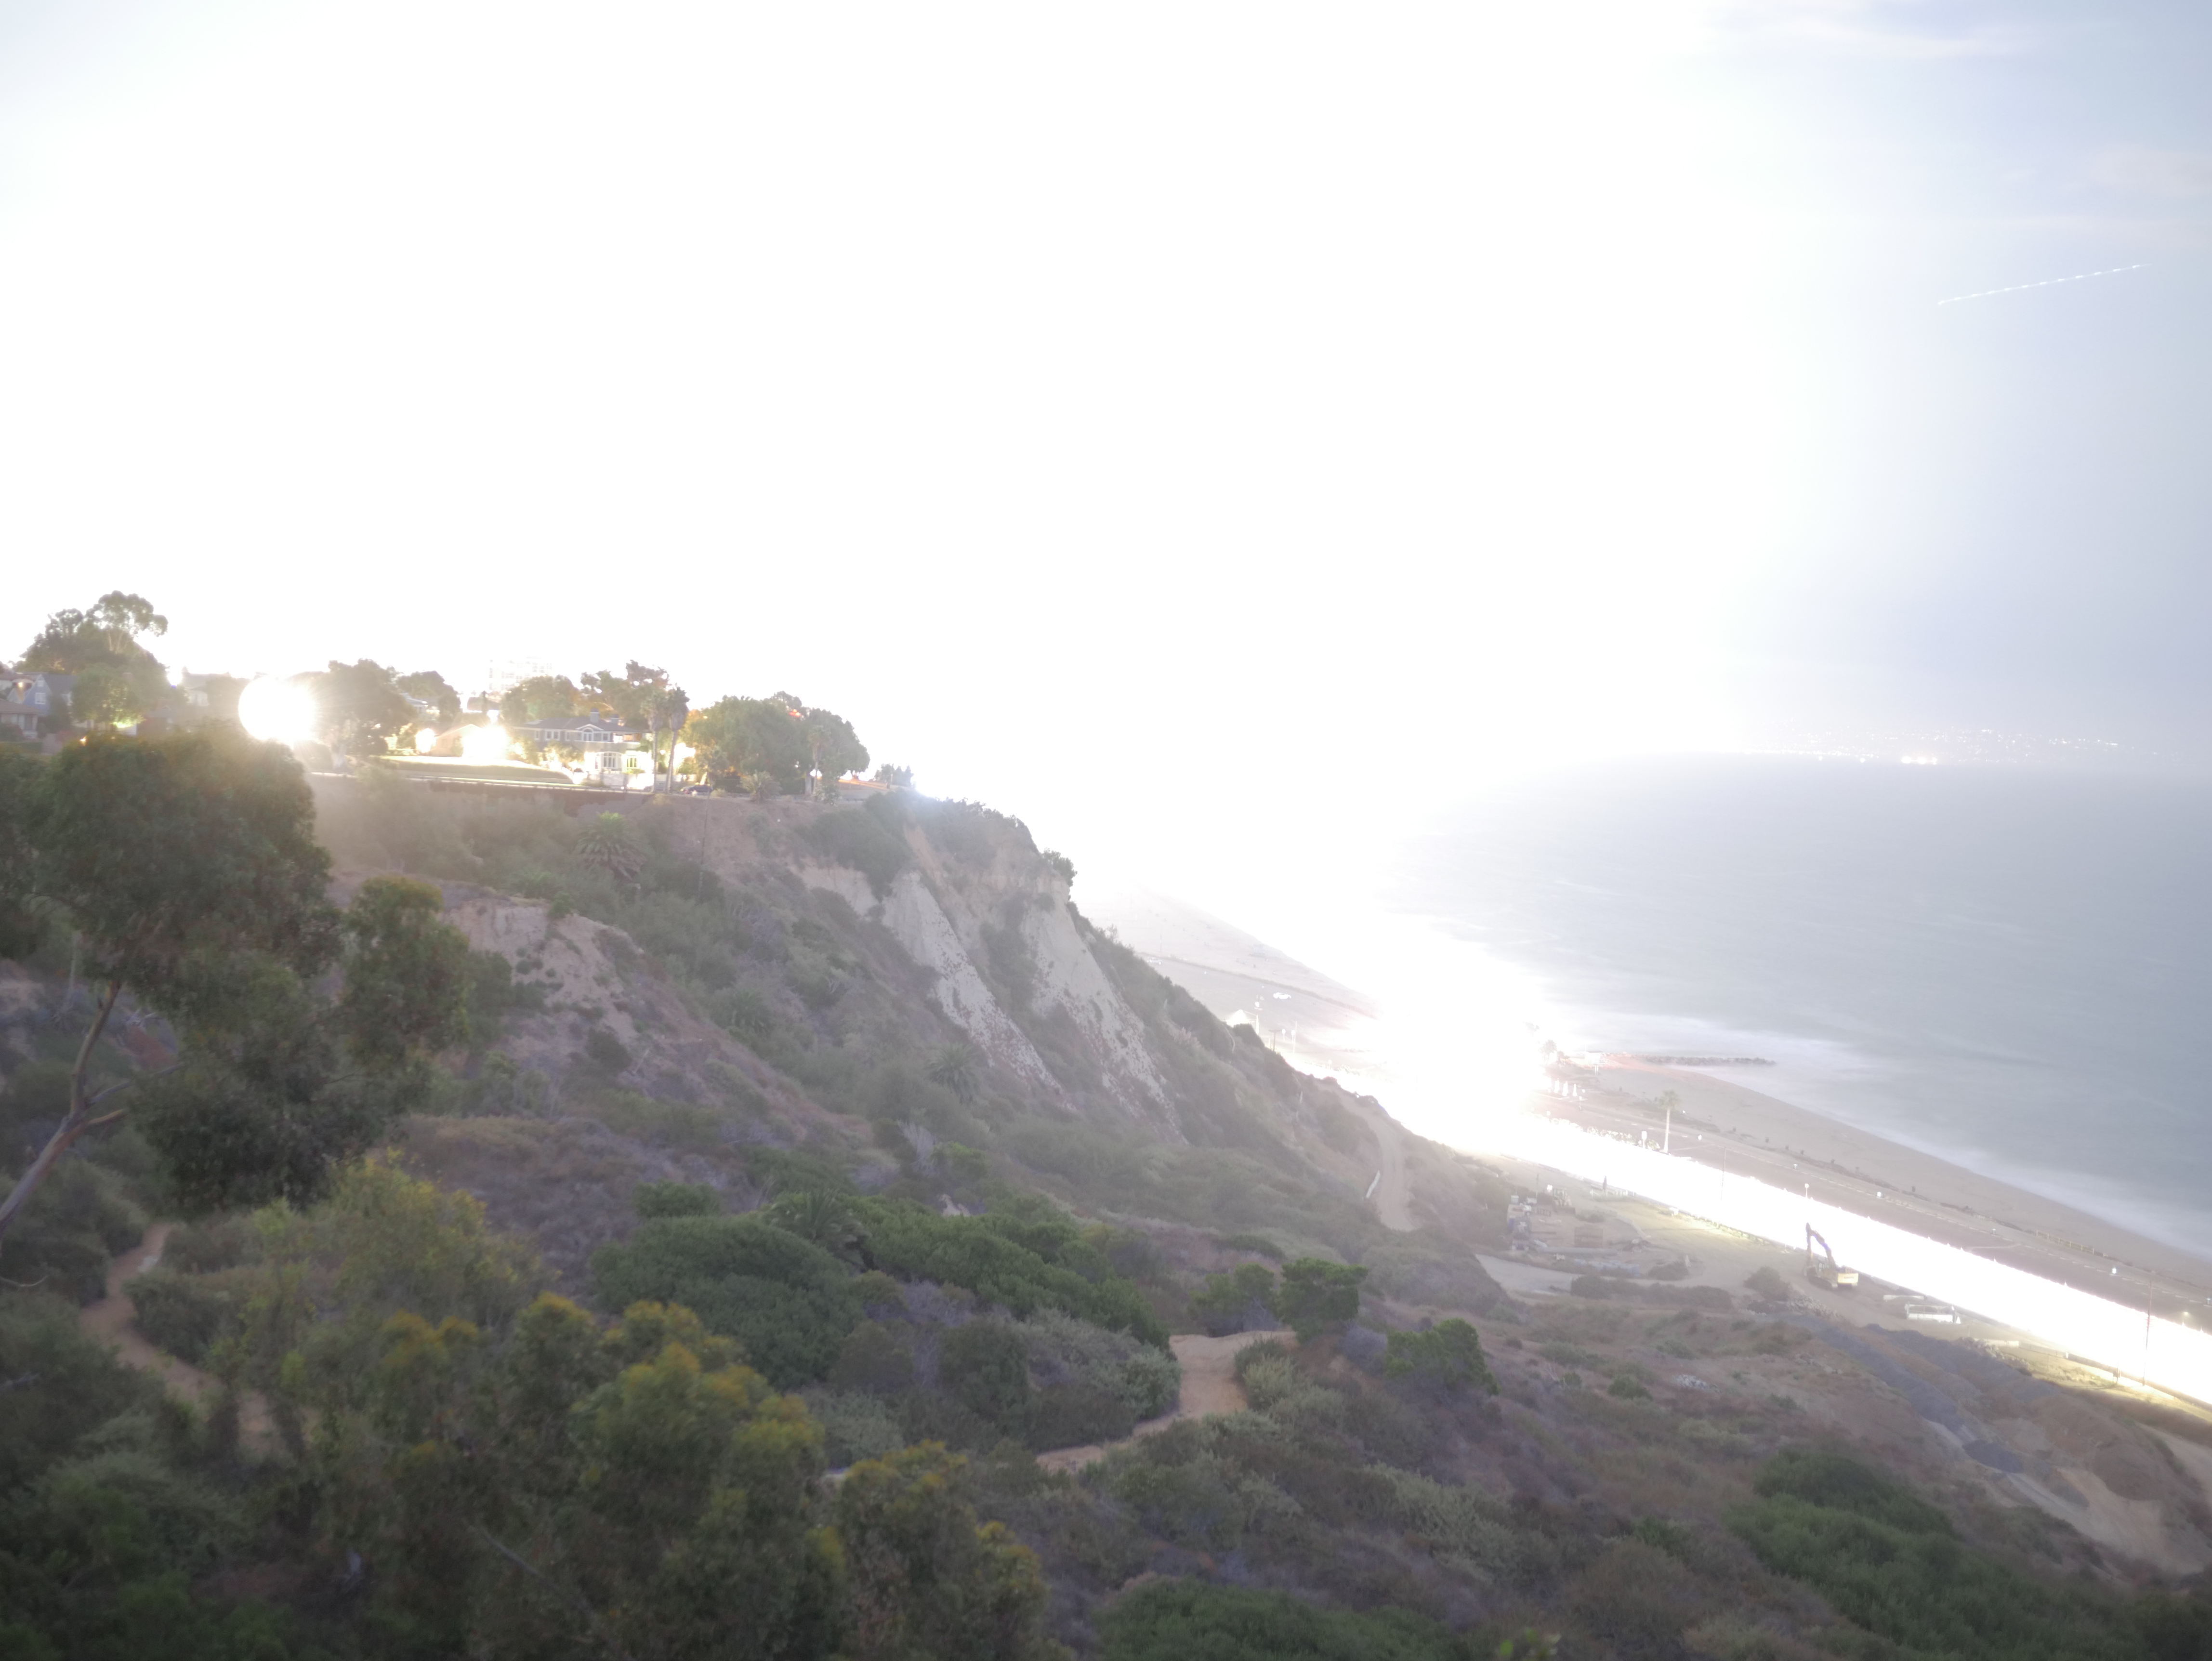
Messing with the shutter speed does affect the motions captured, but it also affects the amount of light captured. Stare at the sun for too long and you’ll burn your eyes, it’s too much light hitting your eyes. Shooting too slowly leaves your sensor exposed to light for longer, that’s why faster shots end up making your shot darker and under-exposed, while slower shots absorb more light and can cause your photo to be over-exposed. The slow shutter speed was open for longer, making it hungry for all the light there could be! There’s one light in the top left area that looks like a sun in the slow shutter speed. It absorbed all the light it could find, scouring the landscape. It took too much light from real light sources, but showed the parts that had little to almost no light as though it was daytime.
Another use for a slow shutter speed is in astrophotography (photographing the skies.) Sometimes staring up in absolute night you’ll see pitch black sky, but your camera can see more. Something to remember is it takes a little more than 8 minutes for the sun to reach the earth, a star is much further, so it takes more time. Set a camera with a proper shutter speed and things your naked eye couldn’t see would be visible on the camera. As a city slicker, I have to put up with light pollution. Light from the city affects our ability to stare at the stars, they’re still up there, just covered. The camera is wanting to absorb any light, and the pollution dilutes a clear path for the light from beyond to reach your sensor all those millions of miles away.
Aperture
Next up is the aperture variable. The body of the camera has the shutter, but the lens has the aperture hole. The value you put is for how wide the hole in the lens is for light absorption. This variable helps alter the range of depth of field. The value is usually written as something like f1.7, but the value is really f(1/1.7). That means that the value shown on the camera’s info display may show a larger number like f11, but that value is actually less than f4. Those numbers are the defined measurements of the opening in the lens. Like with shutter speed, their value also affect the amount of light captured, wider openings lead to more light compared to the smaller aperture. So f11 gets less light than f1.7.
In the next images I have stayed in the same position with the same point of focus, on the camera. The main differences are in the settings, the priority of change in these photos are in the aperture. I say the priority of change because of how the triangle works. I moved the aperture setting but that forced the balance of everything else that needs to be altered and, therefore, readjusting the image itself to the same level of exposure. The full settings don’t matter, but if you want to see the data of photo 1 and photo 2, check out the links and click on the EXIF data. (what’s EXIF? It’s just the saved setting taken to take the shot like your shutter speed, aperture, location (if using something with gps like your phone), date, and ISO among other details, almost every photo (and digital media) stores data beyond the visual (aka metadata))

Now we see the first photo. It was taken with an aperture of f5.1. You’ll notice the camera is sharp and so are the letters and on the camera body. However, the strap behind (with “LUMIX G”) is blurred, so is the texture and lines of the background. Our range of focus is kinda limited to the space the camera takes from the lens of the camera taking the photo to the most back of the image, everything behind the camera is blurred, and if there was anything in front, so would that.

Aaand then… there is the second photo, which was taken with an aperture of f22. There was no readjusting of the focus ring, I personally like using focus lines to tell me what is and isn’t in focus and saw the outline remained around the camera in the shooting screen between shots. So while still focused on the camera, our range of the depth of field increased. It brought out the details of the background. The lines are more defined and so are the textures. When before you couldn’t see what was on the strap, you could read it in the next photo with the “high number” aperture (remember, it’s a higher number but a lower value.) Something to notice is that while the depth of field widened, the point of focus lost a little bit of detail. It’s very subtle but the “LUMIX” and “GF1” on the body look a little sharper on the first image than the second. There’s always something to lose when you gain something in your composition. You can’t get something for nothing. You sometimes may need to consider that aspect too.

ISO

Now we are at the ISO. Before we came here, the variables we were adjusting were “analogue”. What I mean is their effects are physical, widen or lessen the hole in the lens or adjust the speed of the shutter. With ISO, it’s digital image manipulation… technically. Its goal is to brighten up shots that the mechanical/analogue can’t reach a balanced exposure with. It “guestimates” colors that are too dark, it’s why high ISO leads to a “smudgy” image. The sensor got what it could so now it’s up to the ISO algorithm to boost up what it couldn’t catch as well. The photo up top was taken with a pretty high ISO.
It may not be too apparent, because JPEG images include some sort of color adjusting and sharpening, but in the RAW format it was more visual. RAW images take the flattest and “truest” image the sensor is absorbing, JPEG does a little touchup. Most people don’t care about the little details, but others want the ability to work with as pure an image as possible. The boost in a color a camera’s JPEG system codec is something some people would prefer to do on their own in post. This is going more deep into the software side of things and not really needed to understand yet, or ever for some people. I personally do JPEG + RAW since I never know if maybe I took the perfect shot, without knowing, and later on in life could go deep into touching up and editing. It’ll eat up storage in your card but it’s an option. If your camera has the option, set it so it’ll capture both and you’ll see for yourself the difference. It’ll take every photo in both formats. I haven’t posted a proper RAW file since I haven’t found a place that will let me host it. I will have a post on settings beyond the triangle in future.
So What Order Do I Start Adjusting??

Every scene/scenario has an optimal focus and different factors to consider. You’re taking a picture of a waterfall, do you want to capture a single moment and catch droplets falling, or do you want that traditional “soft” looking waterfall style that is typically used? That’s where you want to start working around the shutter speed and adjust the other parameters to accommodate the shutter speed making everything too bright or dark. Sometimes you may be doing a portrait and just want the subject to be in focus, ignore that cool stuff in the back. In this scenario you will find yourself working with the aperture being the core goal, and working the other variables to expose the image correctly. When do you want to use the ISO variable as the variable to make everything else go around it? I say, don’t. It should only be your core if want a certain type of “distortion” in the image, but you could get more control of that in post. It’s easier to blur things up than to sharpen a photo.

Is There Some Sort of Shortcut?

In the previous section we were talking about using a function as our “core” variable for the scene. You want blurry motion, so set your shutter speed to how much you want and adjust the rest of the settings around it to reach an adequate exposure. That’s a lot of work for a “simple” shot I want. Well that’s why there are different modes on the dial of the camera. It’s known as the PASM dial (PASM is an acronym for Program, Aperture Priority (Referred to as Av on Canon), Shutter Priority (Referred to as Tv on Canon), and Manual.) You can see the letters on the photo going up. The other options are camera dependent, this one has various auto modes, a movie mode and custom modes. In shutter priority mode you adjust the shutter speed you want and the exposure level you want the image at, and the camera system fixes everything else to reach your defined exposure level. Usually it will be the one other “analogue” variable if you don’t have auto ISO on.
An important thing to remember is that A is Aperture Priority, not Auto. It makes total sense, as a beginner, that A would be “Auto” but nah. The P is program, but it means program auto. P is what you want for the camera to adjust automatically to the scene without fiddling with parameters.
Jumping to ___ priority modes are a great way to get into working with your camera and learning the effects of your variable changes. Take some terrible photos and learn why it sucked, usually your hands probably weren’t steady enough for such a slow shutter speed, go a little quicker, or put the camera on a stable object like a table, chair or a rock, or lean on a wall, though a tripod is always preferred, it is not the only solution. Learn, make mistakes, and learn some more!
TLDR
- Shutter speed = how fast the shutter closes. All about the motions
- Aperture = The size of the hole in the lens. Mainly about the range of the depth of field
- ISO = the digital brightening of the image. Kind of a last resort/variable to mess with
- PASM gives you the shortcut so you don’t have to manually adjust 1-3
- PASM is an acronym for Program, Aperture Priority (Referred to as Av on Canon), Shutter Priority (Referred to as Tv on Canon), and Manual
Coming Soon
Recommended Settings- I’ll have some recommendations on how to make your camera easier to read and use.
Compositional Fundamentals- what to consider to get what you want in the shot. Working with zoom lenses vs prime lenses to benefit your shots.
Fundamentals of Videography- It’ll be like this but more images per second
Using the Drive Modes- We’ll learn about using timers, time lapse photography and continuous shooting, among others.
Priority Modes (In Depth)- It might be good to understand how everything is supposed to revolve around the “priority”
The Painter and The Photographer- how can principles of one can affect your understanding of the other. Realism vs surrealism.
